PluginsFeatures
Introducing multi-environment management in ReadyCMS
Learn how ReadyCMS’ Multi-environment manager separates development, testing, staging, and production so teams can build and test changes...

Once you decide to separate development work from production, the next step is to set up the environments your project actually needs.
With the ReadyCMS Multi-environment manager, you can create separate development, testing, staging, and production environments, copy an existing setup when needed, and switch between them from the same ReadyCMS Admin.
This guide walks through the setup step by step.
New to multi-environment development?
Start with part one: Introducing multi-environment management in ReadyCMS.
It explains why environment separation matters and how development, testing, staging, and production fit into a release workflow.
You do not have to create all four environments just because ReadyCMS supports them.
The available environment types are:
Production is available by default.
A smaller project might start with production and staging. A team with separate development and QA processes may use development, testing, staging, and production.
Choose the structure that matches how your team already builds and reviews changes, rather than adding environments you don't need.
Open your ReadyCMS Admin and activate the Multi-environment manager plugin.
After activation, the environment selector becomes available in the Admin. Here, you can see your current environment and switch between the environments available to the project.
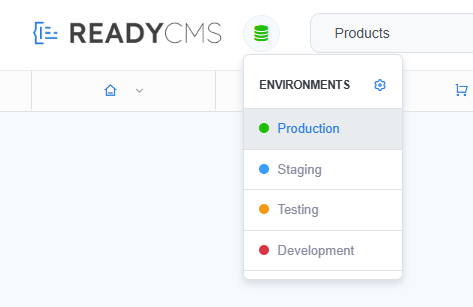
The environment selector shows where you are currently working.
Open the environment settings using the gear icon in the environment selector.
From there, you can add:
Production already exists and remains your live environment.
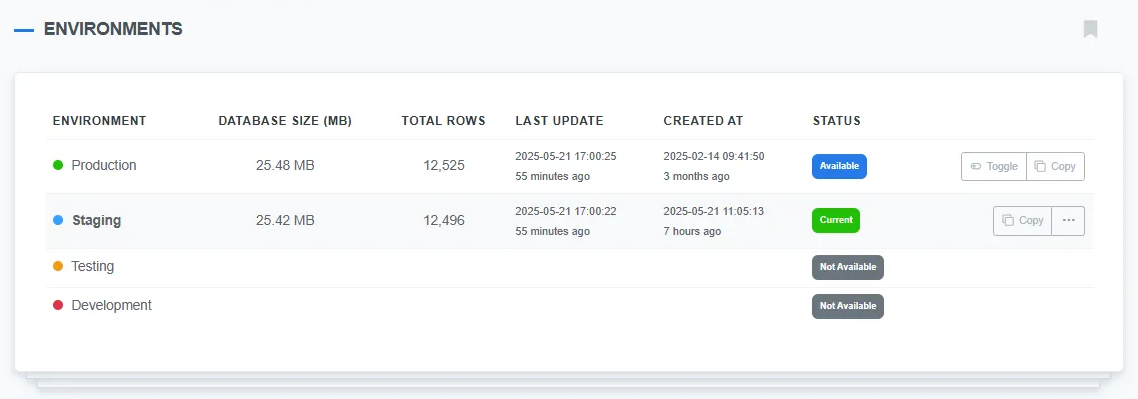 Add the non-production environments your project needs.
Each environment is stored independently, including its:
That separation means changes in development, testing, or staging don't automatically affect production.
A new environment does not always need to start empty.
The Copy Environment tool lets you use one existing environment as the source for another.
For example, if you want staging to begin from the current production setup, you can choose:
Source environment: Production
Destination environment: Staging
ReadyCMS then copies the selected source environment into the destination.
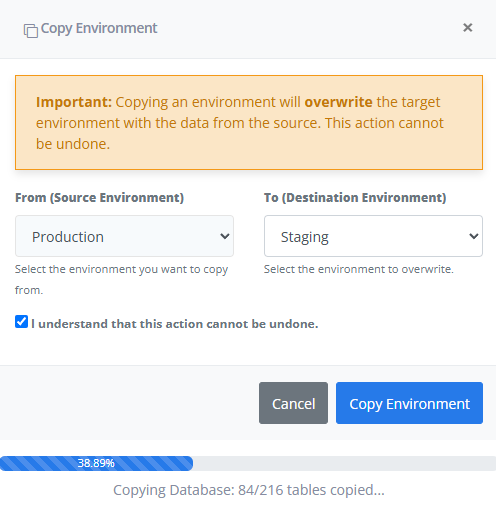
Select the source and destination before starting an environment copy.
Important: Copy Environment overwrites the destination environment.
The action cannot be undone. Before confirming, check which environment you are copying from and which environment you are copying to.
If you copy Production into Staging, the copied Production data replaces the existing Staging environment.
The environments remain independent after the copy. Later changes in Staging do not automatically synchronize back to Production, and changes in Production do not automatically update Staging.
When several environments are already in use, checking the source and destination before every copy is especially important.
Once your environments are available, use the environment selector to move between them.
You do not need a separate Admin login for development, testing, staging, and production.
ReadyCMS also displays a visual banner when you are working outside production.
 Non-production environments are clearly marked while you work.
The banner helps you check the environment before editing content, changing configuration, testing integrations, or starting another environment copy.
It is a small safeguard, but a useful one when several environments look similar.
The environment overview gives developers and administrators a quick summary of the environments attached to the project.
For each environment, ReadyCMS shows:
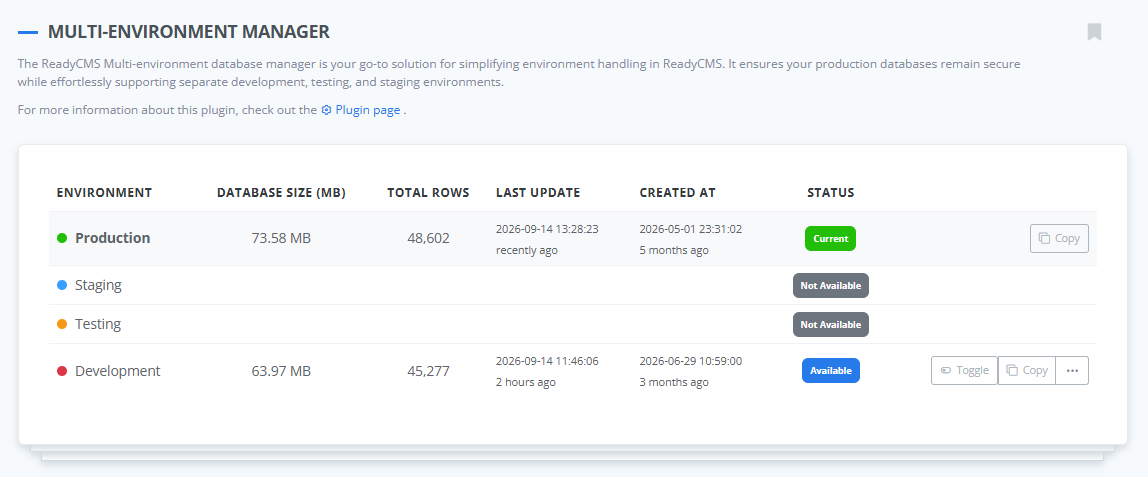 Use the overview to check the current state of each ReadyCMS environment.
This is useful before starting development, testing, or a copy operation. You can confirm that the expected environments are available and check when each one was last updated.
Creating the environments is only the setup. Your team still decides how work moves between them.
A common process might look like this:
Development → Testing → Staging → Production
For example:
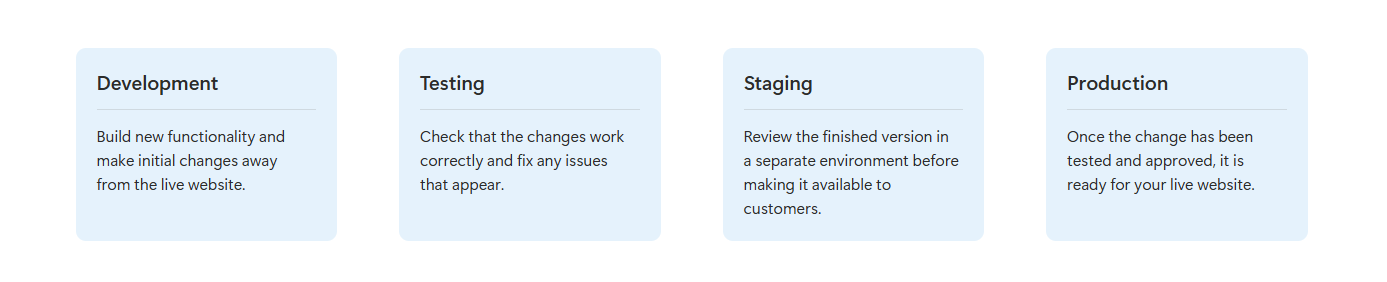 One possible workflow from development to the live production environment.
This is an example, not a requirement.
A smaller team may use only staging and production. Another project may need dedicated development and testing environments because different people handle development and QA.
The key is to keep unfinished work out of production until your team is ready to apply the approved change.
The plugin creates the separation, but your team's process still matters.
Use the environment selector and non-production banner before editing data, changing configuration, or testing an integration.
Source and destination are not interchangeable. Because the destination is overwritten, read both selections before confirming the copy.
Copying an environment gives you a snapshot of the selected source at that point in time. The environments remain separate afterward.
If Production changes later, an existing Staging environment does not automatically receive those changes.
More environments are not automatically better.
Use development, testing, and staging when they represent real stages in your workflow. A simpler project may work perfectly well with fewer environments.
Once you configure the Multi-environment manager, your team has separate places for work that is being built, tested, reviewed, and used by customers.
You can switch between environments from the ReadyCMS Admin, copy an existing setup when you need a new starting point, check each environment's status, and keep production separate from unfinished work.
You still define the exact workflow.
Explore the Multi-environment manager for ReadyCMS →
1. Can I create development, testing, staging, and production environments in ReadyCMS?
Yes. The Multi-environment manager supports development, testing, staging, and production. Production is available by default, and you can add the non-production environments your project needs.
2. Do I need all four environments?
No. Choose the environments that match your development process. A smaller team may use production plus staging, while another project may need separate development and testing environments.
3. Are ReadyCMS environments isolated from each other?
Yes. Each environment is stored independently with its own database, API keys, and configuration settings. Work in one environment does not automatically change another.
4. Can I copy Production to Staging or Testing?
Yes. The Copy Environment tool lets you choose a source environment and a destination environment.
5. What happens to the destination when I copy an environment?
The destination environment is overwritten with data from the selected source. The operation cannot be undone, so always verify the source and destination before confirming it.
6. Does copying an environment keep the two environments synchronized?
No. Copying creates the destination from the selected source at that point in time. The environments remain separate afterward, and future changes are not synchronized automatically.
7. How do I know which environment I am working in?
The environment selector shows the active environment in the ReadyCMS Admin. Development, testing, and staging also display a visual non-production banner.
8. What information does the environment overview show?
For each environment, the overview shows database size, total rows, last update, creation date, and status.
Learn how ReadyCMS’ Multi-environment manager separates development, testing, staging, and production so teams can build and test changes...
Learn how to ask customers for reviews without sounding pushy, including timing tips, email examples, common mistakes, and ReadyCMS...
See how opens, clicks, open rate, and click rate reveal what works—and how ReadyCMS Mail Metrics turns every send into useful feedback.
Build a practical three-email abandoned cart sequence with recommended timings, subject line ideas, message examples, and ReadyCMS...
Learn why customers leave products in their carts, what you can improve during checkout, and how automated ReadyCMS emails can help...
Book a demo or talk with our team about putting these ideas to work.